Sunday, November 22, 2015

#86: Yellow Floral Maxi Dress

Happy Thanksgiving week!

I made this in the Summer, but forgot to post it. I found this dress at a Goodwill outlet for around a buck. I loved the brightness and flow of the dress.

Before: Yellow Floral Maxi Dress

Before: Yellow Floral Maxi Dress
 
 
Unfortunately, the fabric that covered the bust was too small to cover my bust : (
 

No bust space

No problem though. I removed the straps and cut off the bust-portion of fabric.

Removed the straps

Cutting off the bust fabric

Then I folded and sewed a new hem where I had cut.


Sewing a new hem

And really, that was it!


In a few short steps, it went from this:


Before: Yellow Floral Maxi Dress

 
To this:


After: Yellow Floral Maxi Skirt

I think it looks much better as a maxi-skirt, don't ya think?

After

During this season in which we are reminded to be thankful, I remember this past year being one filled with growth in authenticity and learning boundaries with my time, energy, and emotional safety and security. Though that type of growth is often accompanied by pain, I am so grateful that I am moving toward being my more true self, and that I have had loving support and community during this process. So I'd like to know, what are you thankful for? Let me know in the comments :)

May you find joy, peace, comfort, and love this holiday season.

Until next time, blessings.

Sunday, November 1, 2015

#85: Halloween 2015

Hello and welcome to Fall!

This year for Halloween I planned a simple costume with things I already have. Unfortunately, one of the key items went missing. So I found a way to improvise.

Last year my mother-in-law got us tickets to the gameshow Let's Make A Deal. Audience members wear silly costumes in hopes of being selected for the show.

Let's Make A Deal!

I had originally gotten a bright cap and gown with a purple wig to wear to the show.


Before: Graduation Garb

Before: From behind

I even got all fancy with decorating the cap.

Deal University!

Unfortunately, the show taping was cancelled for that day, and the costume has been sitting in my closet ever since.

Thankfully, the gown was perfect to craft into my missing piece of my costume.

First I removed the zipper.


Seam ripping the zipper


Then I removed the sleeves.

Without sleeves

I folded, pinned, and sewed up the arm holes.


Open arms

Pinning and sewing

Reverse, after sewing the arm hole

I took the sleeves and sewed the long edges together, then drew a curved line from the seam.


Drawing a curved line

Then I sewed across that curve and cut the excess.

Sewed, cut along curved line.

Flipped it inside out, and it was a large hood! Any guesses what I'd be? :)

I sewed it back to back with the rest of the cape/body of the gown.


Sewing on a hood.

Then I sewed a space just below the hood and ran red ribbon through it using a safety pin to use as a tie.


A ribbon runs through it.

And that was it! Paired with some of my own matching clothes, my costume was complete!


Before: Red Graduation Gown


After: Red Riding Hood Cape

After: From behind

:)

I hope you all had a happy and safe Halloween!

Take care, and until next time, blessings.

Sunday, October 4, 2015

#84: White Polka Dot Shirt

Hello.

I haven't been feeling well lately. I've been in this constant state of exhaustion which has only been momentarily alleviated. So I've been trying to do lots more self-care these days. And part of that has been sewing more. I've done 2 projects this week and here's the first one:

I found this piece at a Goodwill Outlet, the kind where you dig through large bins and textiles are $1.49 per pound (but it would be a good idea to bring a cough mask and gloves because the dust is REAL).


Before: Ill-fitting white polka dot shirt


When I picked it up, I actually thought it was something else, so it was easy trying to figure out what to do with it.

First I took my seam ripper and removed the seam at the neck and shoulders down the sleeves.

Opening the shoulders

Once they top was opened up, I turned it inside out and drew a line jutting up from the waist.

Prepping the sewing line

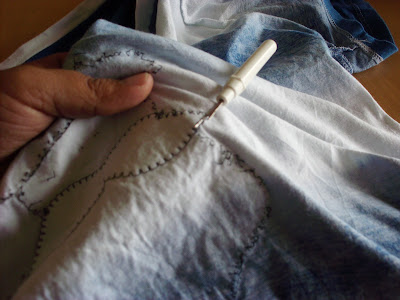
Then I sewed the sleeves closed across that line, cut off the sleeve excess, and fake-serged the edges.

Sewing closed


Fake-serging the edges


Then, I cut across what was the shoulders to make it even, then folded, pinned, and sewed a hem.

Sewing a hem


Flipped it down, and it went from this:


Before: Ill-fitting white polka dot shirt


To this:


After: White Polka Dot Skirt


I honestly thought this was a skirt when I first got it, but was surprised when I went to try it on. I think it's way better as a skirt. What do you think?

I forgot to take after-pictures of my next project, so once I take them, I'll post my next one.

Until next time, blessings.

Sunday, July 5, 2015

#83: Patriotic T-Shirt

Hey there!

For my second post today, I'd like to feature a patriotic t-shirt I found for $2.


Before


Before


The moment I picked it up, I knew this would be my 4th of July shirt. But it had this really odd Uncle Sam/Santa Clause mash-up face on it.


HoHoHo! Merry Independence Day!
 
 
Somebody needs to get their holidays straight.


"I want YOU..."


So first, I cut the stitches and removed the stars.


Not on this star-spangled banner.


Then I piece by piece removed the Santa beard, and the rest of the face.


Removing the stitches

Looks a little more like Uncle Sam

I was glad to find out that the colors underneath the iron-on decals weren't discolored or faded.

Once I had it all removed, I washed it to shrink the holes from the previous stitches.

I thought about keeping it plain, but realized with the lack of red, it no longer was identifiably patriotic, so I decided to add some pizazz .....STARS!!


I sometimes keep things like buttons from old clothes to recycle them into my projects. I had a whole host of metal studs which I arranged in a star-shaped pattern.


Then I glued each one down carefully in place with fabric glue.


And that was it!

Paired with some red accessories, my patriotic shirt went from holiday-confused...


Before: Uncle Sam/Santa Shirt


...to totally Independence Day ready!


After: Stars and Stripes Forever!


 I hope you had a safe, fun Independence Day weekend!


Until next time, blessings.

#82: Jewelry Organizer

Hey, hey, hey!

So it's been almost 4 months since I last posted. That's evidence of how busy I am almost all the time. Over the past few weeks I have successfully allowed myself to not work on the weekend for the first time consistently in 2 years!! And I've been leaving my work computer in my office overnight instead of working until midnight every day! Hooray for me!! I haven't given up on my clothing transformations yet. And with making more free time in my schedule, I want to get back going with my projects. I've got 2 coming at you today, so check back later for my next post!


I've been trying to find a way to re-organize my jewelry. I have a lot of necklaces...


...and have been using a makeshift organizer that ends up with them looking like this:


A tangled mess

Hence, why I want a new way to organize my necklaces.

So I got creative. I found a 3-pack of differently-shaped cork/foam combo boards for $1 at my local 99 Cents Only Store, and chose the heart.


Foam side

I also found a pack of 50 screw-in hooks for $1.


Good deal!


I first made a hole at the top of each arch of the heart and put woden pegs through in order to keep the space open for me to hang it up.


I laid out the spacing of the hooks the way I wanted them, and began screwing them in.


I think the riddler would have this jewelry hanger :)


One side done!


I spaced out the other side more to account for my larger and longer necklaces.


Foam side


I removed the wooden pegs at the top of the heart and fed a zip tie through the hole so I could attach it to a hanger in my closet.


Snip the zips, then ready to go!

And here's how it looks after I hung up my plethora of necklaces:


It's so much easier to hang up and organize my necklaces now that the're on simple hooks in my closet. And the whole thing cost me less than $2!

Thanks for checking out this project. Check back soon for my next one!

Until next time, blessings.