Hello, hello! Welcome back to New Dreams for Old Seams!
It's been a while...a LONG while (almost 5 years) since I last posted one of my clothing transformations on my blog. I've definitely been envisioning and making different creative projects during this time, and have also had a lot of projects that I started but never finished. But I've also struggled during this time with some weight and body image issues that made me feel embarrassed to post new blogs with full-length photos. On top of that, I've had some humongous work challenges and changes over the past 5 years that took a toll on my mental and physical health. I just wasn't sewing for fun as much as I'd have liked to. I kept hoping that I would "find" time to tackle my big bag of clothing projects that sits in my closet. I thought, "One day, when I have more time..." And then the COVID-19 pandemic hit aaaaaaaand......
| Quarantiiiiiiine |
......I still didn't have time. As a human, trying to manage my own mental and emotional health during a pandemic is hard. As a mental health professional, trying to help others manage theirs during a pandemic is even harder. (My mask-making I posted in 2015 sure came in handy!) Thankfully I am now working as a school-based therapy supervisor at an agency that is supportive, so I have a greater sense of stability in my work. But working partly from the office and partly from home doing video therapy for people in crisis is difficult and very taxing. I fantasized about all the time and energy I wished working from home would have given me, secretly envious of those posting on social media about all the new hobbies and projects they were doing, about their boredom of having nothing to do. Meanwhile I felt like I was working longer an harder than ever before, and was feeling exhaustion at the end of most days.
I encouraged my supervisees to make self-care commitments to themselves and repeatedly referenced my sewing projects as a creative self-care outlet that I was looking forward to as soon as I got more time. But recently I began to realize that the self-care I'd been hoping to "find" time for would never come. Extra time and energy wouldn't just fall out of the sky. If I was ever going to get the time to do these things to fill my soul, I would have to "make" the time. Set better boundaries. Know when to stop. Commit to myself. Create my own space. And give myself permission to be creative in a time when everything seems so driven by necessity and survival. So I did. I committed to work on a project I had started long ago, and to complete it. And I thought I'd share it with you all on my blog, full-length, no matter my size or shape. Here goes!
*****Deep breath.......*****
I found this boxy denim dress at a thrift store a few years ago for a couple bucks.
 |
| Before: Boxy Denim Dress |
 |
| From behind |
It was all boxy and had no shape. Plus the neckline was huge and square. I didn't like it at all. But I knew what I wanted to turn it into the instant I saw it on the rack.
 |
| Huge obtuse neckline |
First, I removed the sleeves at the seams.
 |
| So long sleeves! |
Next, I removed the long zipper with a seam-ripper and held onto it for later.
 |
| Zipper removal on my stained table |
Once the zipper and sleeves were removed, I cut the piece straight across below the bust.
 |
| Big ol' chop! |
After cutting in half, I seam ripped all the way down the back seam where the zipper was, folded a new hem, pinned the zipper ending a few inches from the bottom.
 | |||
| Re-aligning the zipper |
I sewed in the new zipper placement...
 | |||
| Sewing in the new zipper placement |
...then darted, folded, and sewed a new hem where the zipper ended.
 |
| New waist hem at the top of the zipper. |
I spread the top open as flat as I could make it, and removed the darting at the bust. Then I measured and pinned a square a little less than a foot wide.
 |
| Laid flat and pinned |
Then I cut out a large square from where the bust was (do you see where this is going?)
 |
| Bust square |
From the back material, I cut 2 rectangles and sewed them together to make a slightly smaller square, fake-serged and hemmed the edges, and sewed the smaller square onto the larger square, leaving one side open.
 |
| 2 squares, pinned and prepared to sew! |
Once the squares were hemmed, I aligned them with the center of the skirt (opposite the zipper), pinned, and sewed the square to the waistline of the skirt (do you see my vision yet??).
 |
| Sewing the square to the skirt |
From the remaining material, I cut 2 long strips from what used to be the shoulders, flipped them inside out, and ironed them.
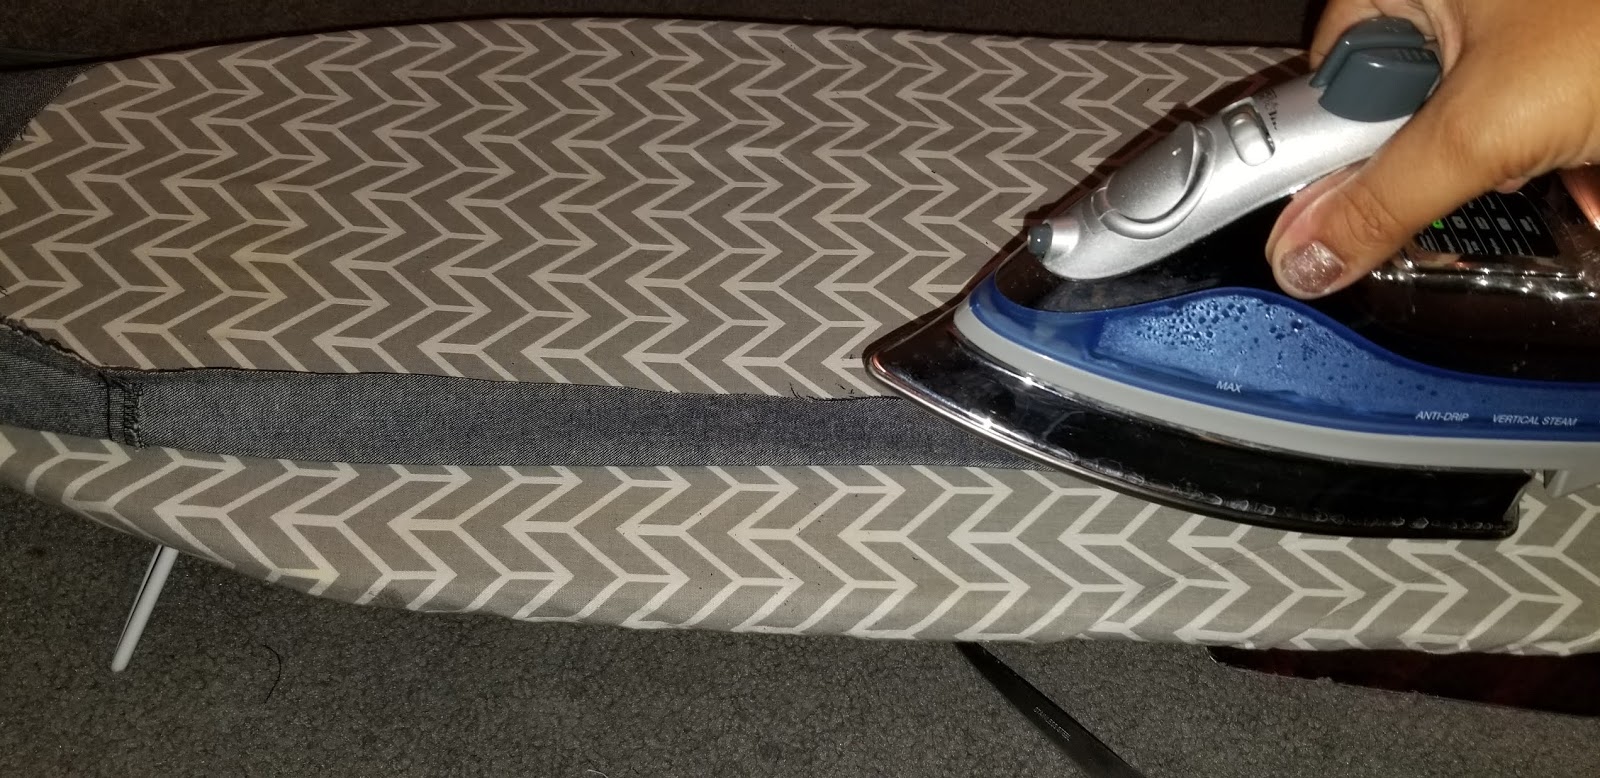 |
| Cut, folded, ironed |
After ironing to make a stiff fold, I zig-zag stitched each strip inside out so the edges wouldn't fray.
 |
| Sewing the strips |
I safety-pined the end of the sewn strip, then pushed the safety pin all the way through the inside of the sewn strip to the other side to turn it right-side-in (or is it right-side-out? Or is it outside-in? I don't know). Next time I'll use a stronger safety pin because it bent and popped open a few times and stabbed my fingers.
 |
| Safety-pin push-through. |
Once flipped inside out, I ironed the 2 strips again to make a flat fold. Then I pinned and sewed the strips to the top corners of the front square, then to the back about an inch or so on either side of the zipper.
 |
| Pinning those straps |
So, I thought I was done, but then my husband asked whether this skirt had a pocket. No, it didn't, but now that he'd asked, I knew it needed one!
Problem is, I've never made a pocket before. So this was a bit of a challenge.
About the only material I had left were those sleeves I had removed first. So I took a sleeve, turned it inside out, and aligned where I wanted it to go.
 |
| How do you make a pocket out of a sleeve? |
Next, I sewed the sleeve closed in a pocket-y type shape.
 |
| That's pocket-y, right? |
I pinned it in place and then cut where I would place the outside opening.
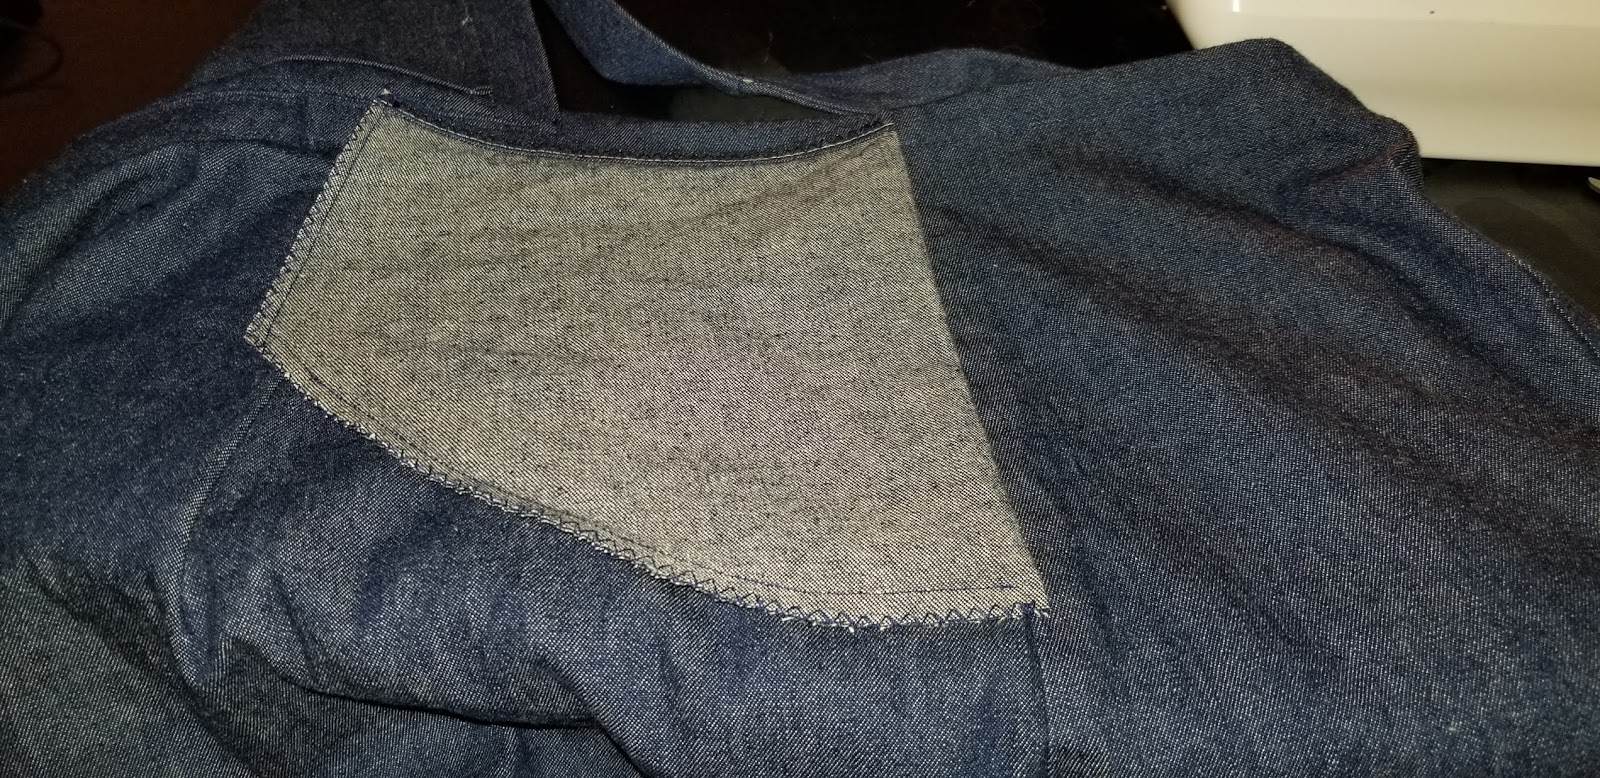 |
| Placement everyone! |
 |
| A pocket's got to open somehow |
I aligned the pocket with the skirt opening and pinned it inside-out...
 |
| Pinning pocket |
...and sewed it with a fake-serge to keep it from fraying (this was extra difficult at the top and bottom of the pocket opening since I wanted it to lay flat, but it had a rounded seam).
 |
| Peter Piper Pocketed a Pickled Pepper. Now Peter Piper Plots in Prison. |
I made a pocket! Then I COMPLETELY undid it and used the other sleeve to make a new one because this one was too small and was upside-down. The new pocket was MUCH better.
Finally, I re-hemmed the bottom of the skirt so the thread color would match the rest of the piece.
And then I was done!
 |
| Before: Boxy Denim Dress |
 |
| Before: From behind |
And here, my friends, is the end result:
 |
| After: Skirt Overalls! |
 |
| After: from behind, rolls and all <3 |
 |
| With a... |
 |
| POCKET!!! (not just one...) |
 |
| ...Second pocket! (and I've seemed to go toothless) |
I'm not going to promise that I will pick up making new projects and blog posts non-stop, but I will say that as I "make" time instead of hoping to "find" time, I am going to commit to doing more of the creative sewing that I enjoy, and hopefully you'll get to see some more of my creations soon! And I challenge you:
What is one thing you will commit to doing this week to nurture your self-care? Comment below!
I look forward to reading your responses :)
May you and yours remain safe, sane, and healthy during this time of social distancing.
Until next time, blessings.


