Sunday, July 5, 2015

#83: Patriotic T-Shirt

Hey there!

For my second post today, I'd like to feature a patriotic t-shirt I found for $2.


Before


Before


The moment I picked it up, I knew this would be my 4th of July shirt. But it had this really odd Uncle Sam/Santa Clause mash-up face on it.


HoHoHo! Merry Independence Day!
 
 
Somebody needs to get their holidays straight.


"I want YOU..."


So first, I cut the stitches and removed the stars.


Not on this star-spangled banner.


Then I piece by piece removed the Santa beard, and the rest of the face.
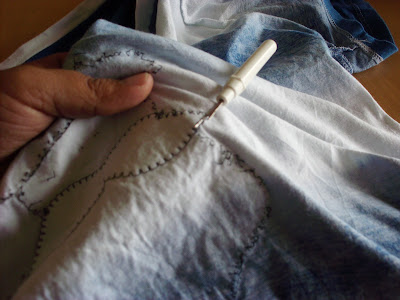

Removing the stitches

Looks a little more like Uncle Sam

I was glad to find out that the colors underneath the iron-on decals weren't discolored or faded.

Once I had it all removed, I washed it to shrink the holes from the previous stitches.

I thought about keeping it plain, but realized with the lack of red, it no longer was identifiably patriotic, so I decided to add some pizazz .....STARS!!


I sometimes keep things like buttons from old clothes to recycle them into my projects. I had a whole host of metal studs which I arranged in a star-shaped pattern.


Then I glued each one down carefully in place with fabric glue.


And that was it!

Paired with some red accessories, my patriotic shirt went from holiday-confused...


Before: Uncle Sam/Santa Shirt


...to totally Independence Day ready!


After: Stars and Stripes Forever!


 I hope you had a safe, fun Independence Day weekend!


Until next time, blessings.

#82: Jewelry Organizer

Hey, hey, hey!

So it's been almost 4 months since I last posted. That's evidence of how busy I am almost all the time. Over the past few weeks I have successfully allowed myself to not work on the weekend for the first time consistently in 2 years!! And I've been leaving my work computer in my office overnight instead of working until midnight every day! Hooray for me!! I haven't given up on my clothing transformations yet. And with making more free time in my schedule, I want to get back going with my projects. I've got 2 coming at you today, so check back later for my next post!


I've been trying to find a way to re-organize my jewelry. I have a lot of necklaces...


...and have been using a makeshift organizer that ends up with them looking like this:


A tangled mess

Hence, why I want a new way to organize my necklaces.

So I got creative. I found a 3-pack of differently-shaped cork/foam combo boards for $1 at my local 99 Cents Only Store, and chose the heart.


Foam side

I also found a pack of 50 screw-in hooks for $1.


Good deal!


I first made a hole at the top of each arch of the heart and put woden pegs through in order to keep the space open for me to hang it up.


I laid out the spacing of the hooks the way I wanted them, and began screwing them in.


I think the riddler would have this jewelry hanger :)


One side done!


I spaced out the other side more to account for my larger and longer necklaces.


Foam side


I removed the wooden pegs at the top of the heart and fed a zip tie through the hole so I could attach it to a hanger in my closet.


Snip the zips, then ready to go!

And here's how it looks after I hung up my plethora of necklaces:


It's so much easier to hang up and organize my necklaces now that the're on simple hooks in my closet. And the whole thing cost me less than $2!

Thanks for checking out this project. Check back soon for my next one!

Until next time, blessings.