Monday, May 6, 2013

#34: Hospital Chic

I've been at my new job for a month and a half now, and I'm realizing more and more how important it is to take good care of myself. I never realized how much I value time at home doing absolutely nothing productive! Sewing is part of my self-care, and obviously I haven't made a new project in a while, so I was glad to finally have time at home this weekend to work on a new project.

So my husband and I have an agreement that I will not buy any new thrift store projects until I've finished everything I've already got in my big bag of transformations, which means I haven't gone thrifting in a few months (yeah, I've got a lot of projects in that bag!). But while I was looking for a non-project item at a thrift store, I found and fell in love with this project dress, and my husband made an exception as long as I got rid of something else in my closet : )

Before: Asymetrical Lined Dress

Before: From Behind

The asymmetrically-lined outside looked pretty bland, but I was really digging the light blue polka-dotted 2nd layer of the dress. Once I got it home and tried it on, I realized that it kind of looked like a hospital gown.

Blue Polka Dot Under layer

I knew exactly what I wanted to do with this dress that would hopefully make it less hospital-chic ;) Let's see what I did!


The shoulder straps had been shortened by folding and sewing some big buttons on them. So I first removed the shoulder buttons.


Folded Shoulder Buttons

Removing the shoulder buttons

Next, I removed the straps at the sides of the waist.

Say goodbye side straps


The dress had 3 layers: one asymetrically-lined sheer white outer layer, the pretty blue and polka dot middle layer, and a shorter sheer slip underneath. I carefully removed the under layer slip.

Separated under slip

Then I laid them on top of each other and cut off the original straps.

Cut off the top

I flipped the under slip layer inside out and laid it on the outside of the other 2 layers, sewing together all 3 layers at the cut edges.

Re-arranging the layers

Sewing along the cut edges

With the original under layer re-attached on top, I flipped it up, and cut along the lined seam down the center. Then I folded over and sewed a short hem on both sides of the seam I had just cut.

Preparing for buttons

On one side I sewed on buttons I picked up at JoAnn's, and on the other side I sewed in button holes (which were a pain in the neck!). The fabric was so delicate that it kept getting caught in my machine. So I cut open one of the side straps I had removed and laid it under where I sewed the button hole just to make it more sturdy. I cut off the excess after sewing the button holes.


Buttons

Sewing on buttons

Button-holing (with extra material)

Buttons!

Next I removed the side seams to make some arm holes. and re-sewed the sides up to a point which would make the sleeves loose and airy.

Make space for the arms!

I sewed together the seams at the shoulders, and shaped the neckline by cutting, folding, and sewing the front and back of the neck, cutting off the excess material.

Folding, shaping, sewing!


Finally, I folded and sewed a small open hem at the waistline. I took some thin elastic, attached one end with a safety pin and the other end with a bobby pin, and pushed the elastic all the way around the waistline opening, sewing the ends closed.

Elastic in the waist

Once I was done, I threw a light slip underneath and had a brand new dress!

Here again is the hospital-chic look from before:

Before: In need of some resuscitation


And here is the new, fresh, light dress transformation:

After: Boho-chic!

After: from behind

It turned out just how I wanted it to! From hospital-chic to kind of boho-chic. And given that the weather reached nearly 100 degrees in SoCal last week, I'd imagine that a light, airy maxi-dress might be a welcome relief for the upcoming Summer heat (thought it's pouring rain today)!

I hope you liked my newest transformation! And thanks for being so patient for it. I haven't quite figured out yet how to regularly schedule in time to sew, but I hope sewing will become a regular part of my weekly routine soon. We'll see what treasures I find next!

Until next time, blessings. 

Sunday, April 21, 2013

#33: Floral AND Frills!

Hey y'all! So, the weather's been confusing me lately. Though I enjoy the sun, I'm wondering what ever happened to "April showers brings May flowers." Even in sunny Southern California there's usually some early spring rain, but instead it has been rather warm and super dry. Well, since it's getting warmer, I thought I'd work on a warm-weather piece. I actually began this transformation last Summer, but I wasn't satisfied with the result, so I put it away to give it another shot. Time to pull it back out of my big bag of projects!

Before: Unflattering frills!

Before: Built-in beads

It had a nice, Spring-y floral feel, but the added chest frills, too-short under slip, and built-in beads didn't belong in any season. So I tried to make this a bit more practical. Armed with my strawberry lemonade and Netflix, my self-care Sunday commenced.

Strawberry lemonade and Last of the Mohicans

The first things to go were those 4 strings of chest beads.

Beads

Next I had to tame those chest frills. Removing them completely wasn't a good option because underneath looked too thin and plain. Instead, I pinned and sewed them down at the bottom edges.

Sewing down the frills

I liked the way this framed the bust of the piece.

Sewn down frills

Next, I took a long strip of blue scrap material I had handy and sewed it at the waist seam between the top of the piece and the skirt. I chose blue because it matched some of the little blue flowers in the skirt and provided some nice contrast to the pale yellow.

I first sewed the top of strip upside down to hide the seam.

Upside down blue strip

Then I flipped the strip down and sewed the bottom.

Sewing the bottom of the strip

The dress was too long to be a shirt, but too short to comfortably be a dress, so I decided to go the shirt route and cut about 6 inches from the bottom of both layers of the dress.

Cut cut cut!

I folded and sewed new bottom hems for the under slip and the outer shell. I also took the outer shell in a bit on both sides.

I like when I can utilize most of my project materials, so I grabbed 2 of those strings of chest beads and a piece of thin elastic.

Beads and elastic

I sewed one end of the elastic to the ends of both strings of beads.

Bead ends sewn to the elastic


Then I fitted it around my head, cut the elastic, and sewed the other ends of the beads and elastic together.

Wham, bam, homemade headband!

Beaded headband

After taming the frills and re-purposing the chest beads, I had a new, fresh piece that was a little more practical and fashionable than before. Here's a reminder of before:


Before: Frilly beaded floral dress

And here's the new look:

After: Less-frilly floral shirt

After: From behind

Plus the headband!

After: Beaded elastic headband (and super straight hair part!)

I doubt this will be a keeper for my closet, but I think it's a good upgrade for whoever wears it next! And it's nice to finish a project I started over half a year ago :)


I hope there is some more rain on the forecast soon. I'd like to have at least one more chance to cozy up with my blanket and some hot cocoa before it's time for popsicles and swimming pools!

And I'm REALLY excited about the next transformation on my list. Here's a sneak peek:


Next time on New Dreams for Old Seams....

Until next time, blessings.

Monday, April 15, 2013

#32: Shiny Purple Shorts!

Hello again! I'm loving my new job, but I feel like it has been AGES since I've sewn! I was glad to have a nice Sunday off, and took the opportunity to paint my fingernails and sew (I'd recommend doing those in the reverse order. So much smudging). I dug through my big bag of projects and pulled out this puppy!

Before: Shiny purple shorts!

I found them at my favorite thrift store a few months ago for one dollar. I already had a transformation in mind when I picked them up. Let's see if my vision came to be!


First, I separated the seam between the legs of the shorts with a seam ripper.

Split shorts

Then I sewed away the inner thigh material and cut off the excess so it was like a skirt.

Sewing away the inner thigh material

Shiny purple skirt

Next, I cut a large slit just underneath the elastic waistline on each side, leaving half of the elastic connected on both sides.

Cutting under the elastic waistline

Then I folded it flat so that the 2 cut parts were on the sides. These were becoming new shoulder straps.

Slit shoulder straps

I sewed the piece straight down the sides, then I laid the piece flat and cut off the excess material I had sewn. I kept those 2 side panels for later.

Cut off the sides

I measured and sewed the new shoulder straps to adjust for length, cutting off the excess. Then I fake-serged around all the edges to keep them from fraying.

Sewing the shoulder straps

I took in the sides to give it a little more shape, but not too much to be clingy. Then I folded and sewed a new hem for the underarms on each side. I also darted both sides just under to bust to give it more shape.


Side darts under the bust

It's time to make some flowers. First I grabbed those 2 side panels I had cut off and cut out multiple circles in descending size (no need to be perfect with this).

Shiny circles


Then I took the circles and cut wavy edges (again, no need to be perfect).

Wavy edges

I stacked the wavy shapes on top of each other from largest to smallest, setting aside the smallest shape.

Stacked wavy shapes

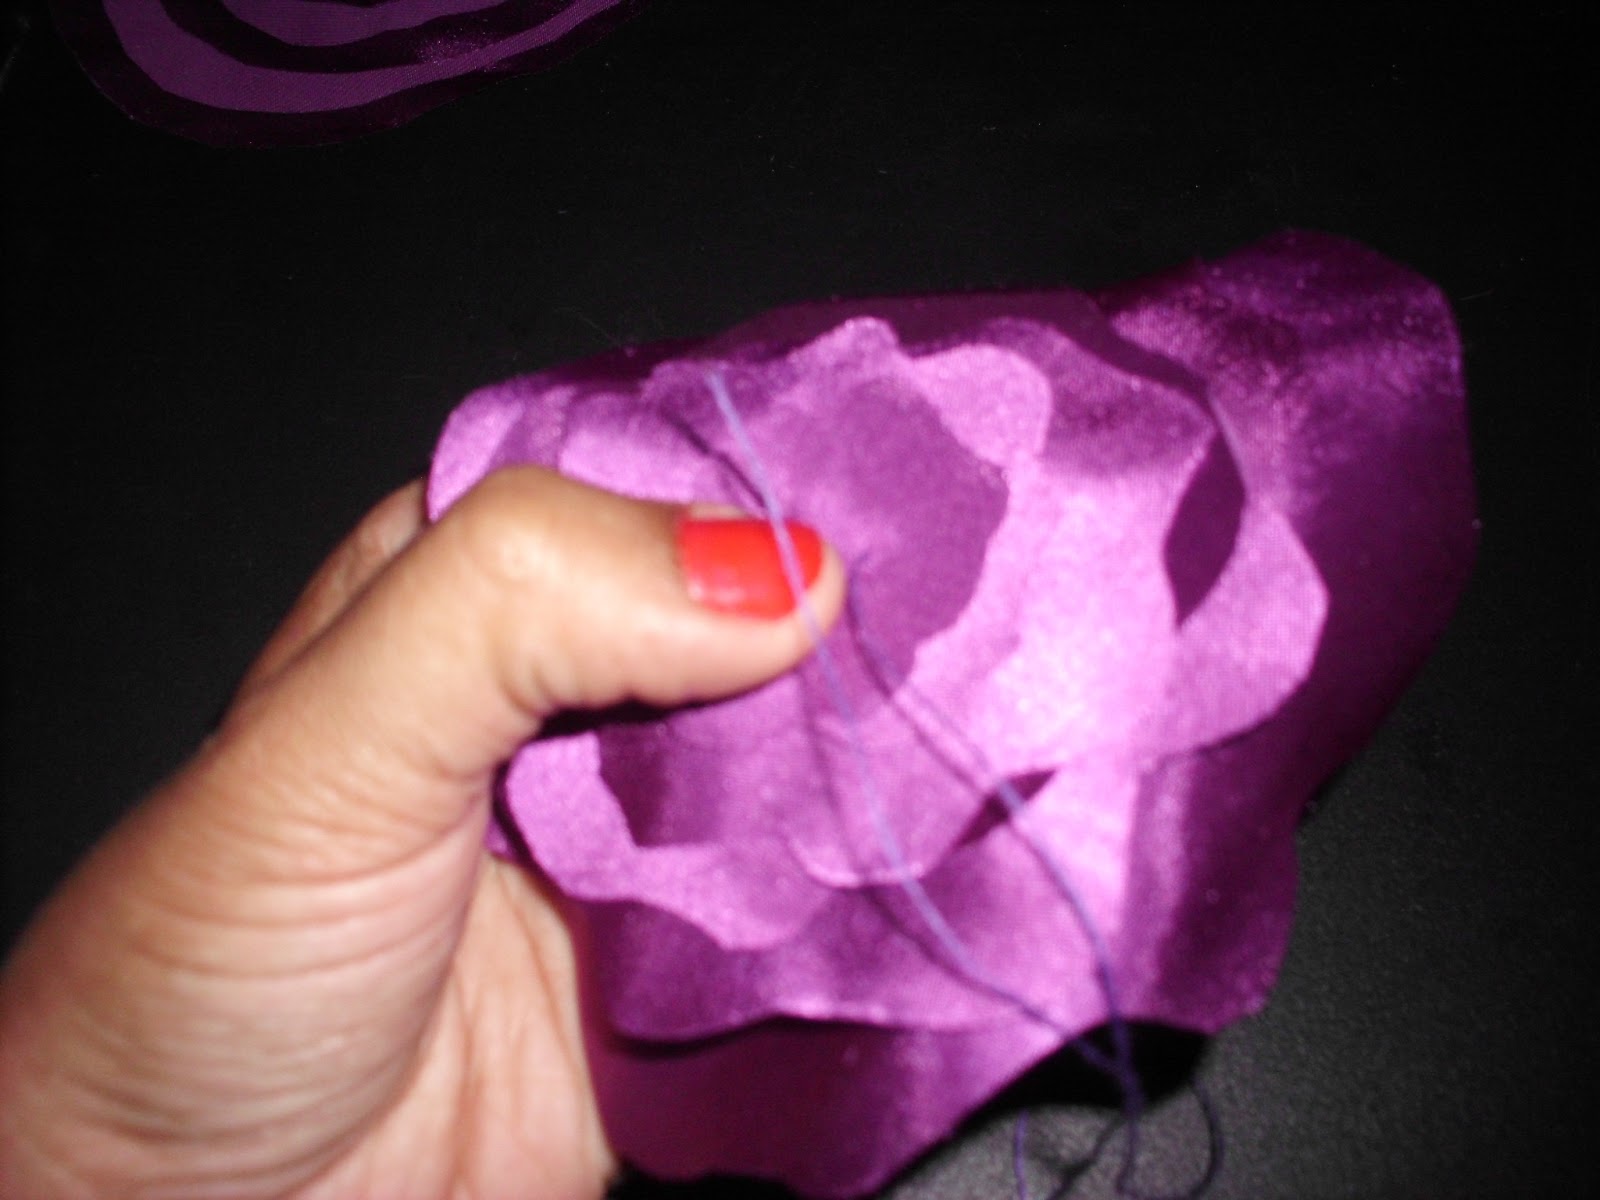
I hand-sewed a small "X" pattern in the center of the stack of shapes, pulling tightly so it would bunch up.

Hand-sewing the flower

Then I took the smallest shape, folded it in half twice, and sewed it into the center of the bunched flower. 

Bunched wavy flower

I found a great tutorial for a felt scarf with these kind of flowers on Pinterest. I made 2 of them.

Two wavy flowers

I pinned the flowers at the base of the upper right strap. Then I sewed them on carefully so they wouldn't lose their waviness.
Wavy flowers pinned and sewn


Finally, my new blouse was complete! 

Here again is how it looked before the transformation: 

Before: Big shiny purple shorts

And here's my new blouse!


After: Shiny purple blouse


After: From behind

I like the way the elastic waistband lent itself to a nice wide neckline. And I love the bit of fair the shoulder flowers add to it.

It's very light and comfortable, and when I pair it with a flowy cover, I feel very therapist-y in it; perfect for my job!

After: Covered all therapist-like

I hope you like how this one turned out as much as I did! Let me know what you think in the comments section below! I'm looking forward to working on my next project soon :)

And my thoughts and prayers go out to all of those affected by the bombing at the Boston Marathon. Peace be with us all.

Until next time, blessings.